Maya lighting
And Zbrush here

Se afișează postările cu eticheta modeling. Afișați toate postările
Se afișează postările cu eticheta modeling. Afișați toate postările


miercuri, 23 septembrie 2009
I decided to go further on this model and to create a normal map. First of all I had to clean up geometry and UVW a little bit.


Then I made some details in zbrush.


And the result:


But I'm thinking of making making it human and put some skin on it.
marți, 5 mai 2009
At this statue I am working right now. We do not have budget of polygons or texture (the objects are not going to be sent into a game) so there is no specific problems. There are few requierements regarding the quality and crearness of textures. Actually there is no any detailled needed. Anyway I decided to make it as it would.


luni, 4 mai 2009
This object was entirely modeled and textured by me. I made a high poly object and a bake with it for normal map. That is why it is easy to take this as high polly object; but at a closer look at the profile one could see that it is actualy a low poly.


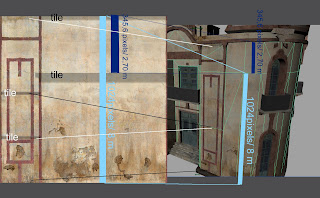
The special thing about this building is the system of tiling wall texture. I remember that the requirements for that particular building were that:
- all the brown gap should be kept as they were in concept art;
- not be modeled but made only by texture; everything should be made with the fewest and the smallest possible textures.
I had a wall of about 10, 70 meters and with the technique of advanced tiling I managed to cover it with only 8 meters (1024 pixels) and keeep the rule of 128 texture pixels /1 meter of geometry.
So instead of having 5 textures for this building I reduced them to 4.
1. this-the wall texture (1024/1024),
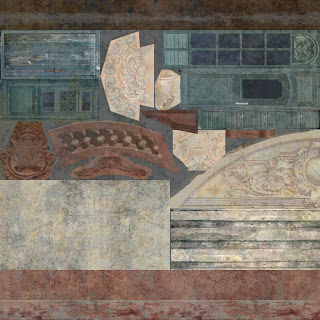
2. the building parts texture (1024/1024),
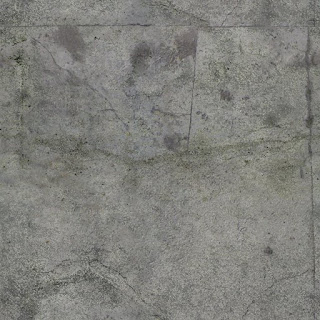
3. here is the third roof paviment (512/512),
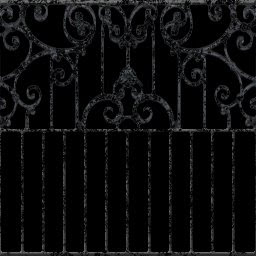
4. and the alpha one (256/256),
Of corse, with normal and specular map:


The first challenge for this bulding was that the texture dimensions were 2048/2048 pixels and two objects, two houses assigned. The good part for that strategy is the diversity of detailes contained in and no repetition texture ptoblem. The bad thing was the hard way of changing in progress, getting more detailes after starting. There would be no room for other detailes and if one would want to modify some parts of one building that would affect automatically the other building and a lot of extra work would be needed.

The second chalenge was the wood wall. This house is about 8.80 m hight. We were working under a common rule of no less than 128 pixels texture allocation for 1 meter on the geometry. So there would be a space of at least 512 pixels needed for such a wall. But there won't be space for other detailes. So I used a waist that surrounded the house in order to tesselate the geometry and to use a smaller part of texture. The waist hide exterior striations wall tiling texture. It was the house's waist that prevent the repetion of base texture dirt; I tesselated the wall under the waist and moved aside the UVW choordonates so that repetition is not noticeable. I does not matter if the actual wall cut is a seam because the waist covers it well.
But the problem was not solvet yet. There were another 5.8 meters wall geometry upper the waist that should be assigned by these 4 meters (512 pixels) of texture. It was the dirt moisture that had to be kept for the sick of diversity. So there was no way to make a realistic simple tiling with this image. I solved this by putted a tiling part inside and connect it so to avoit the seam. In the image bellow I darkened that tiling spots just to be perceviable (in real texture they are not noticeable).

The same thing I have at the roof, only ths time the problem were different. In order to catch the detailes of roof edge (marked with red) I had to tesselate the smaller roof surface. If I wouldn't have done it than the smaller roof would look too detailed because becouse it meassured only less than 3 meters and not 4 like the bigger one. So this time I had to make the tiling spots inside texture in order to get rid by 1 meter extra texture but to keep the upper and downer roof edge.

Abonați-vă la:
Postări (Atom)